A freeware application is available to automatically backup and restore your SQL Server Express database in the event of failure. Download and install SQL Backup and FTP on the pos station running SQL Server from http://sqlbackupandftp.com using the default installer settings.
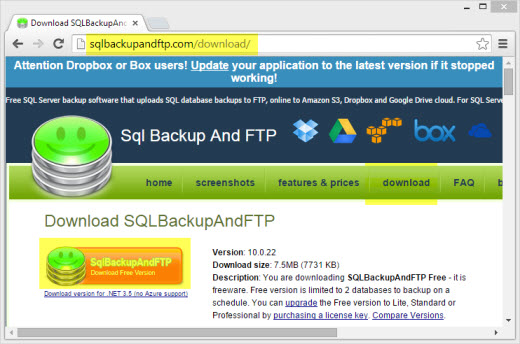
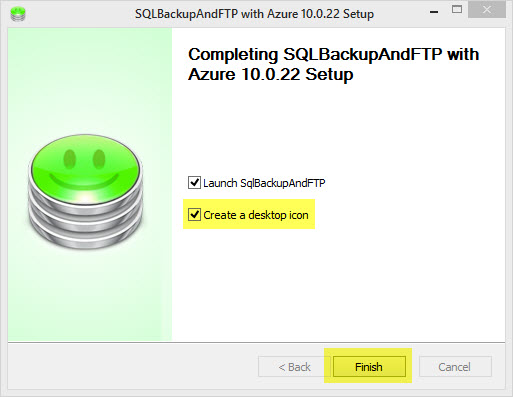
Download and run the SQLBackupAndFTP installer on the main pos station (where the SQL Server Express is installed). Proceed with the default settings. On the final screen check the box to create a desktop icon for easy access.
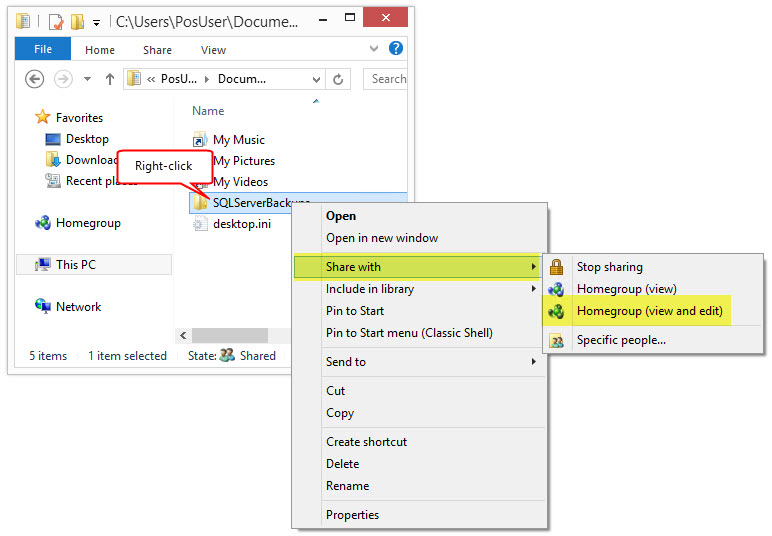
Create a backup destination on a different computer. In this example a backup folder named SQLServerBackups is created at STATION2. The folder is in the user/documents folder and can be shared with other Homegroup users by right-clicking on the folder and selecting Share with | Homegroup (view and edit). For users with a single pos station, use a USB thumb drive or other removable media. Backing up to the same hard drive that stores the database is not recommended in case of disk failure.
Run SQLBackupAndFTP from the desktop shortcut on STATION1 and verify that the SQL Server Express instance is displayed with the AmigoPOS database. If the correct SQL Server Express instance is not shown, click the Connect to SQL Server/Azure button to browse for the server instance that contains the AmigoPOS database. Check the box next to the AmigoPOS database and click Add backup destination.
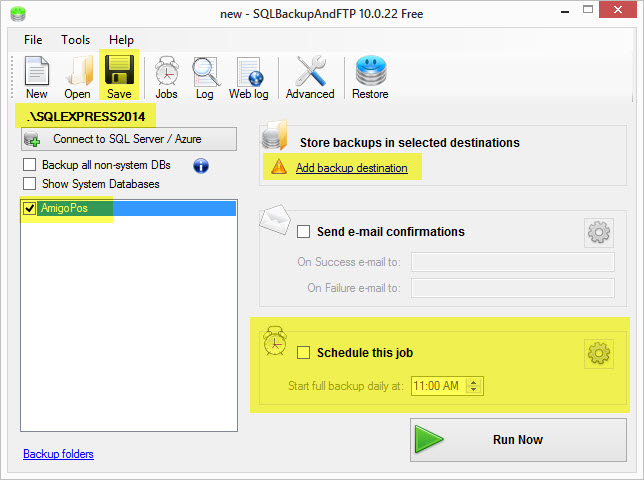
In the backup destinations windows, click Local/Network Folder to browse for the folder that is shared on STATION2.
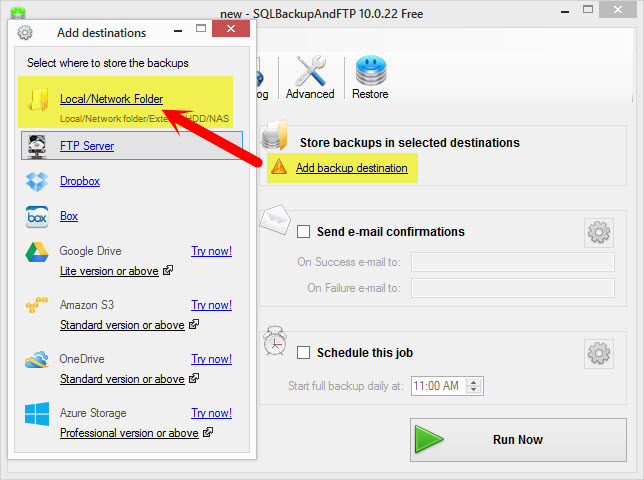
Click the folder icon to browse for the shared folder. Note that the backups can be auto-deleted after a predefined interval to save disk space.
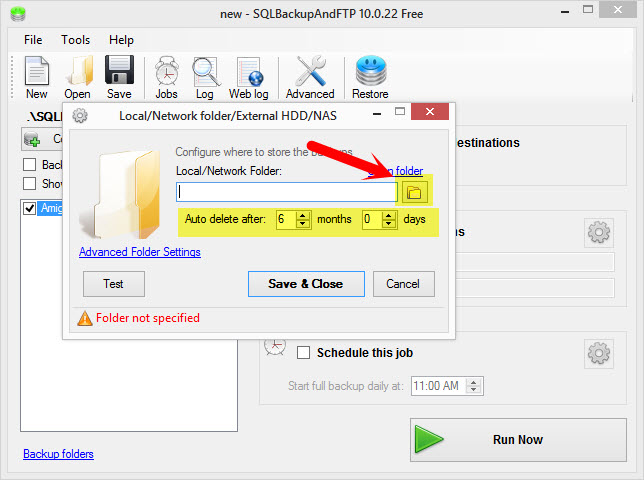
Expand the directories and locate the shared folder on STATION2. Select the folder and click OK.
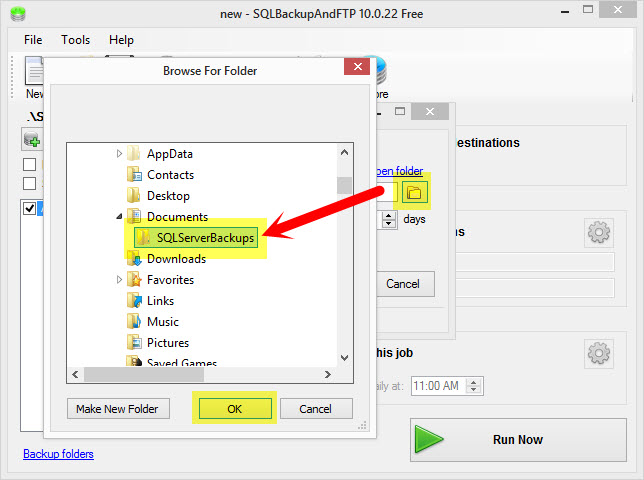
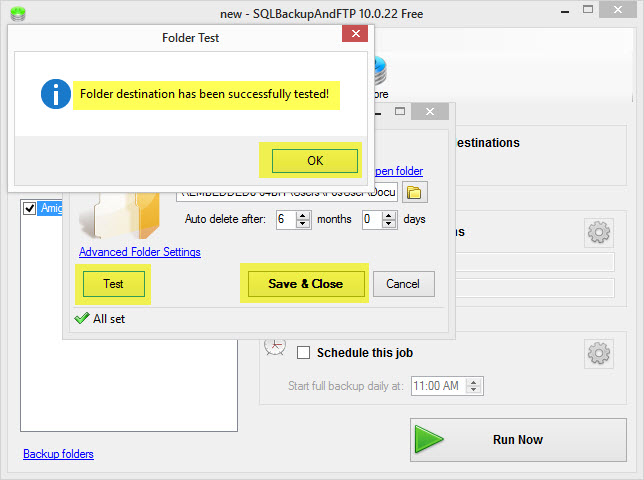
Click the Test button to verify that STATION1 has sufficient permissions to write to the backup folder on STATION2. Click OK followed by Save & Close to return to the main screen.
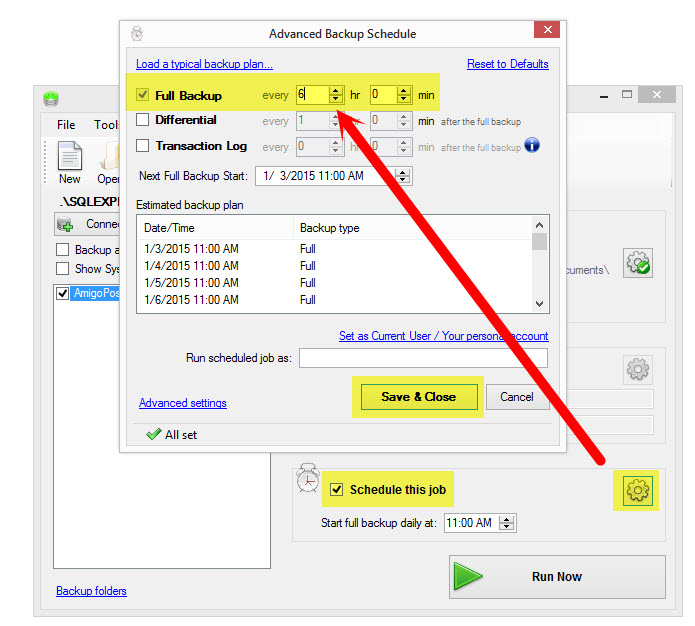
Check the box next to Schedule this job and select the backup interval. The example below is set to backup the database every 6 hours. Click Save & Close.
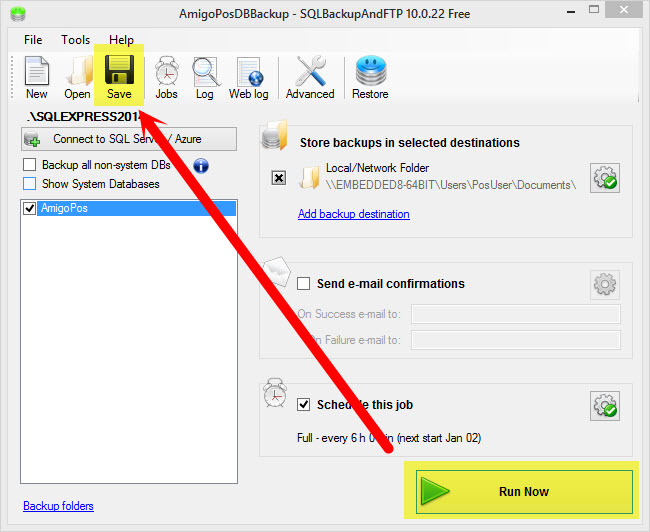
On the main screen click Run Now to verify that the backup is created correctly. Open the destination backup folder on STATION2 and confirm that the backup file exists in the folder. Click Save at the top to save the job to the desktop; a prompt will appear requesting the Windows user name and password. This information is required to run SQLBackupAndFTP as a WIndows Service. Blank passwords are not allowed.
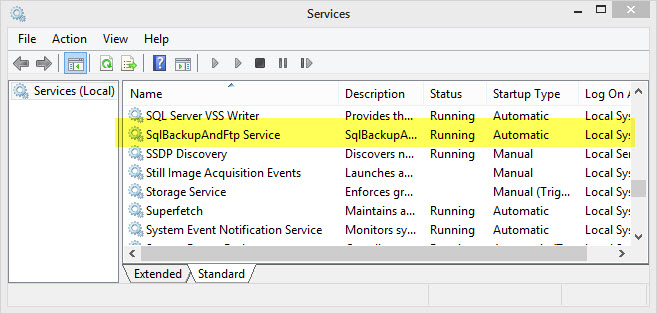
SQLBackupAndFTP runs as a Windows service and can be viewed by running the Windows Control Panel/Administrative Tools/Services applet.
